Timelapse

6 axis control

Each axis movement can be set individually and independent of the other axis.

Quick adjustments

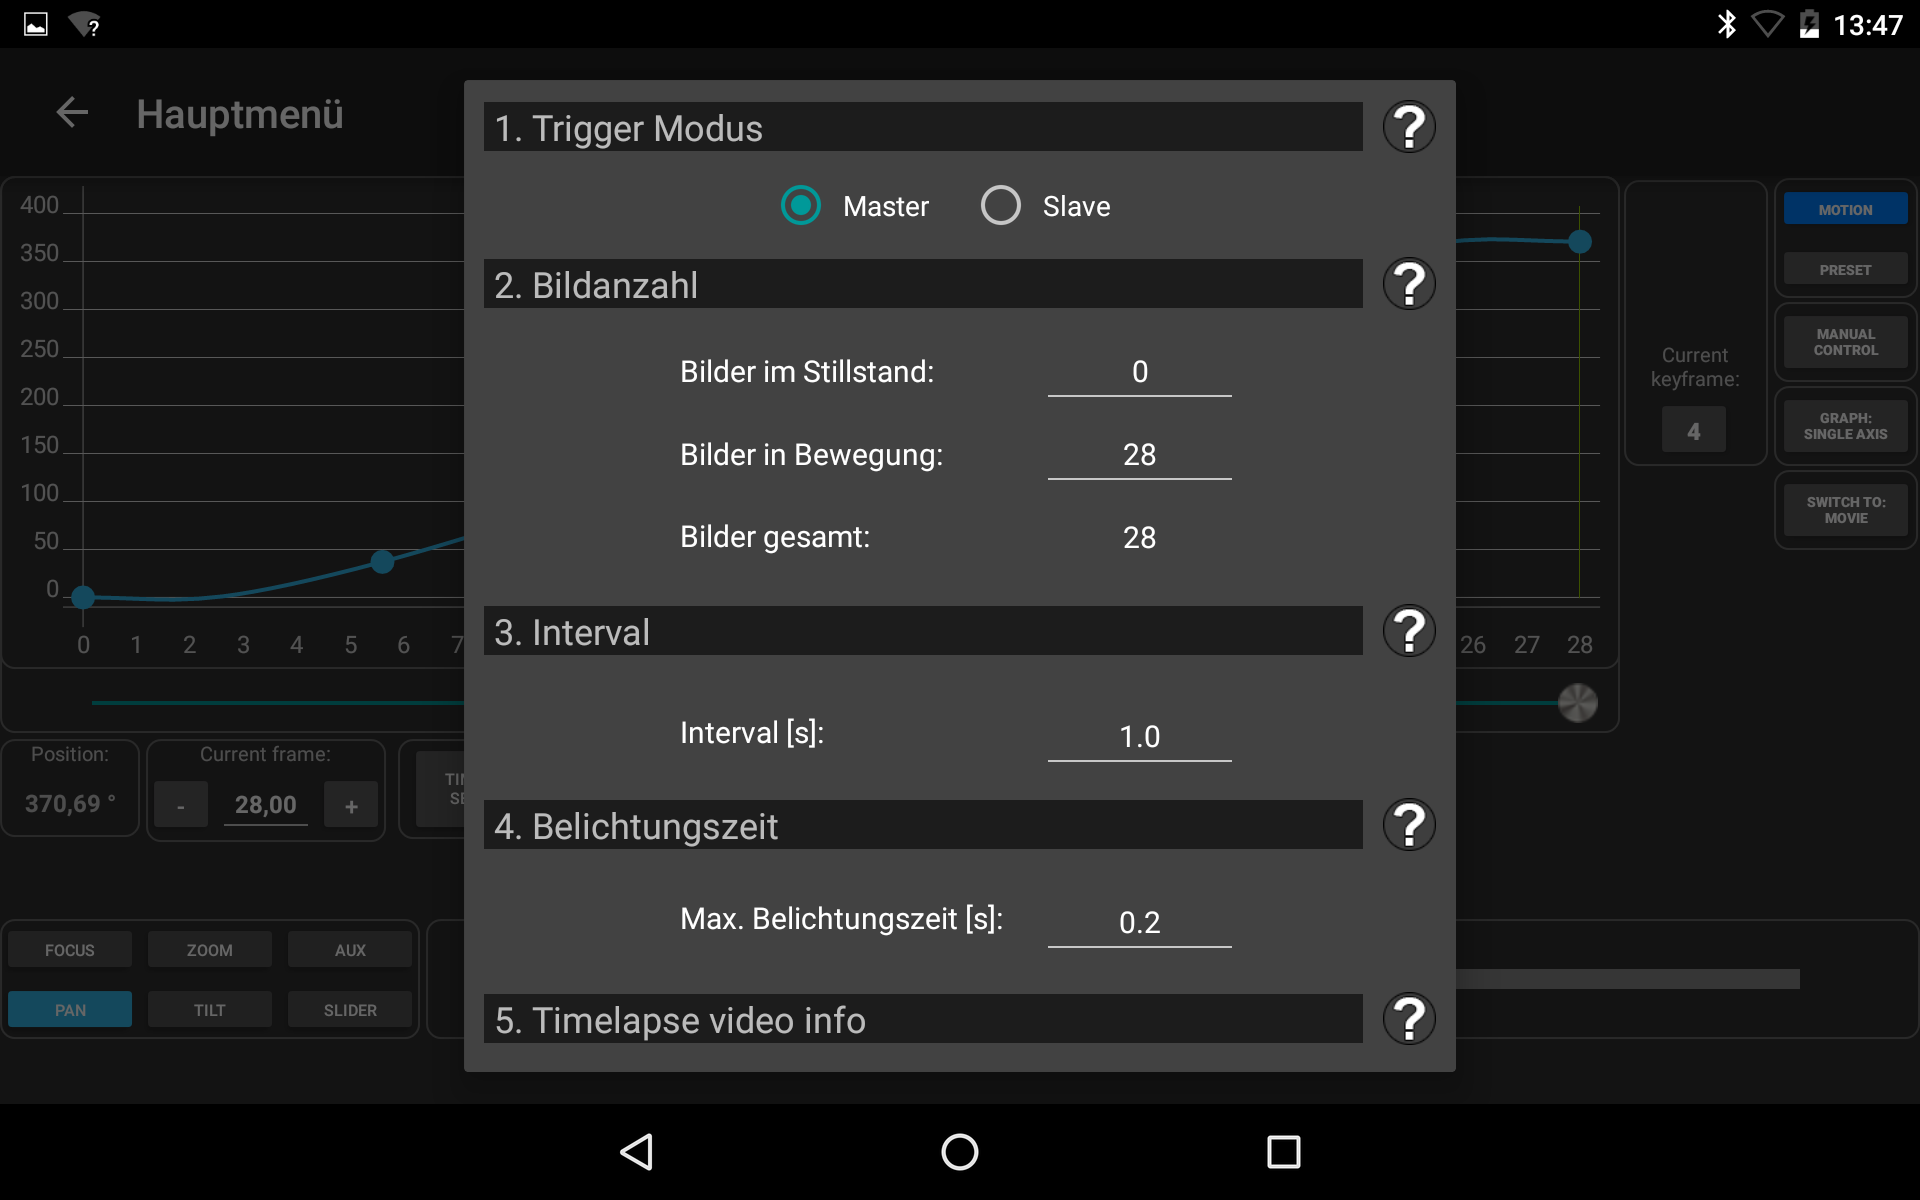
Adjusting the positions, making different settings and switching between shot-move-shot and video mode can be done within a few clicks.

Free keyframes

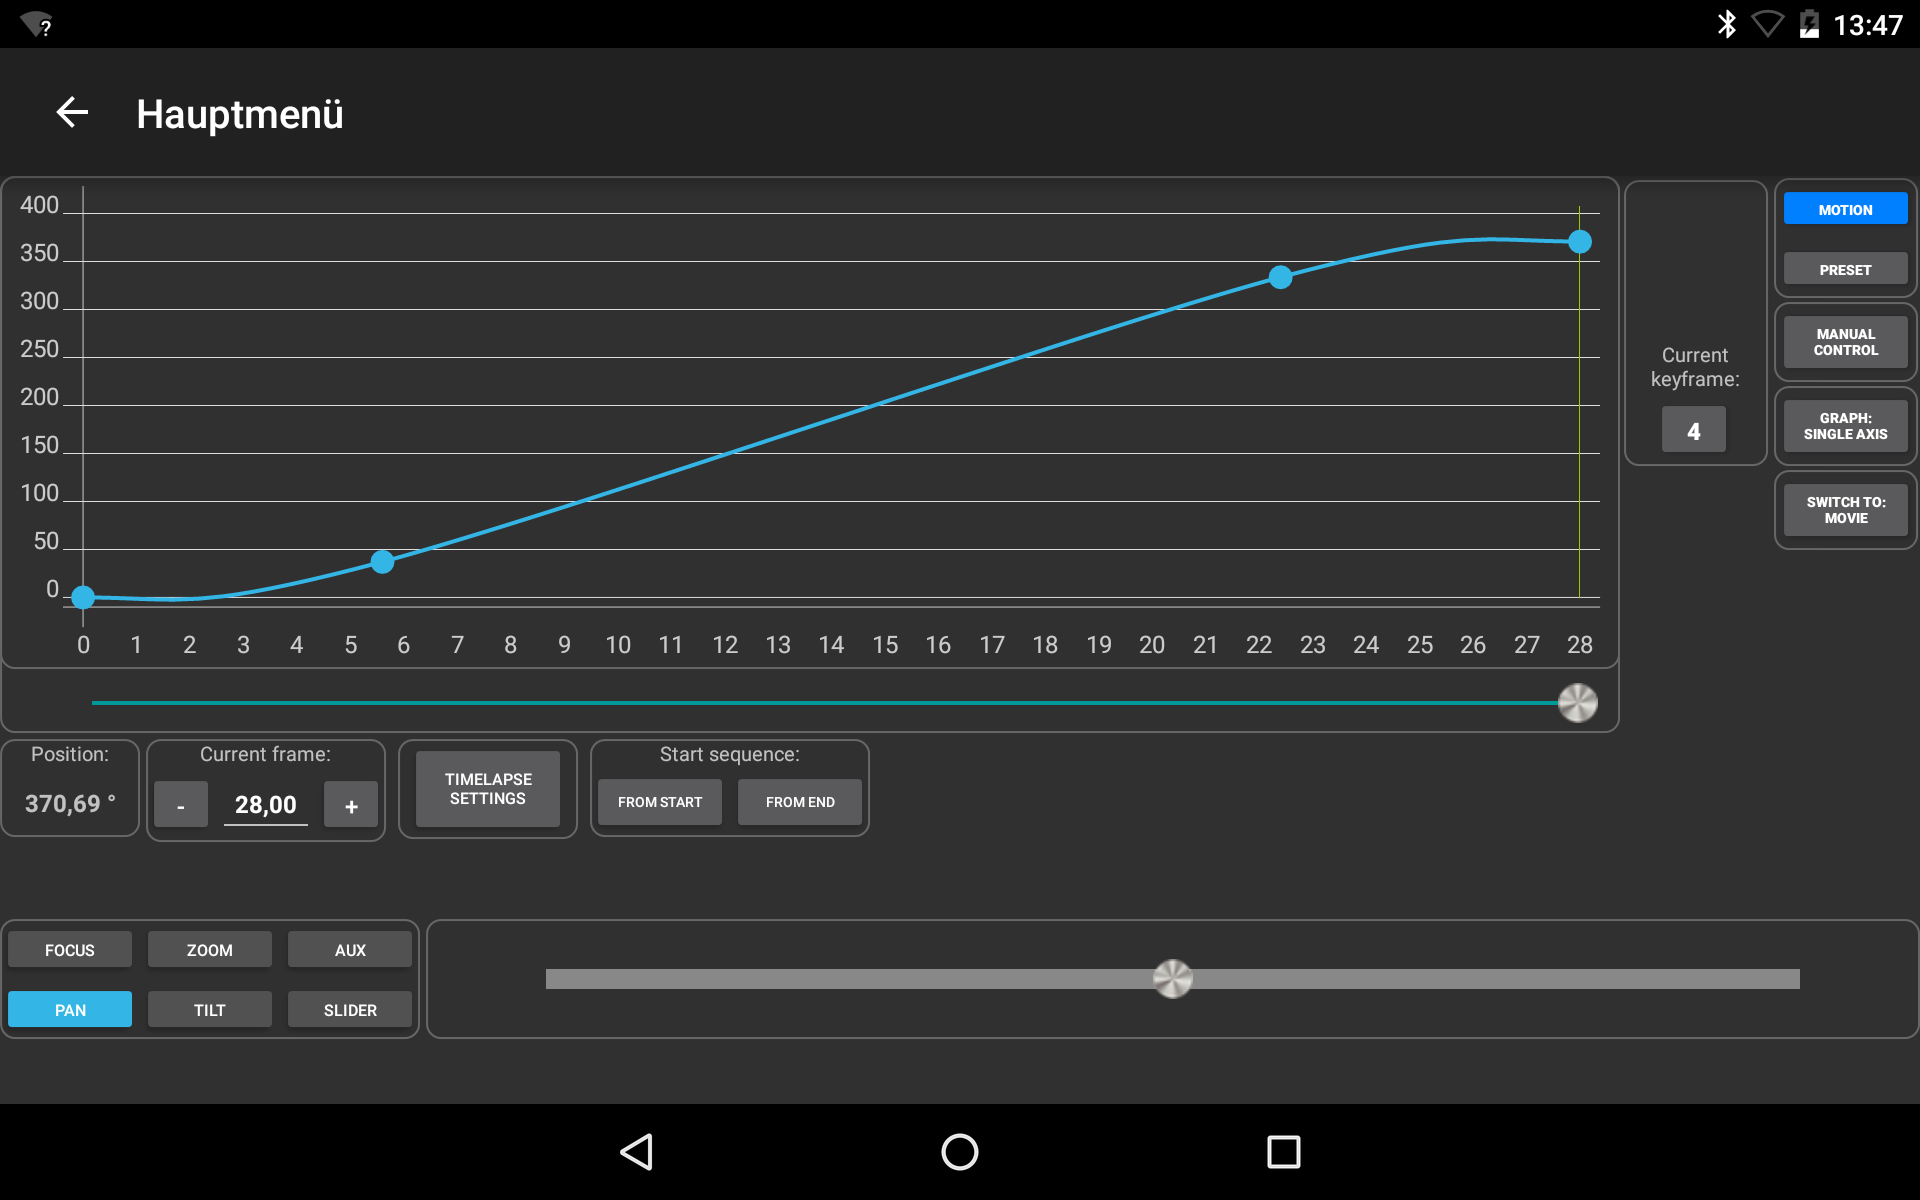
The amount and position of keyframes can be set for each axis individually.

Save presets

Each motion can be saved as preset and be recalled in the future. This way you can achieve a quick setup and repeatable shots.

Different motion types

Choose between different motion types or setup your own motion using individual keyframes.

Start and forget

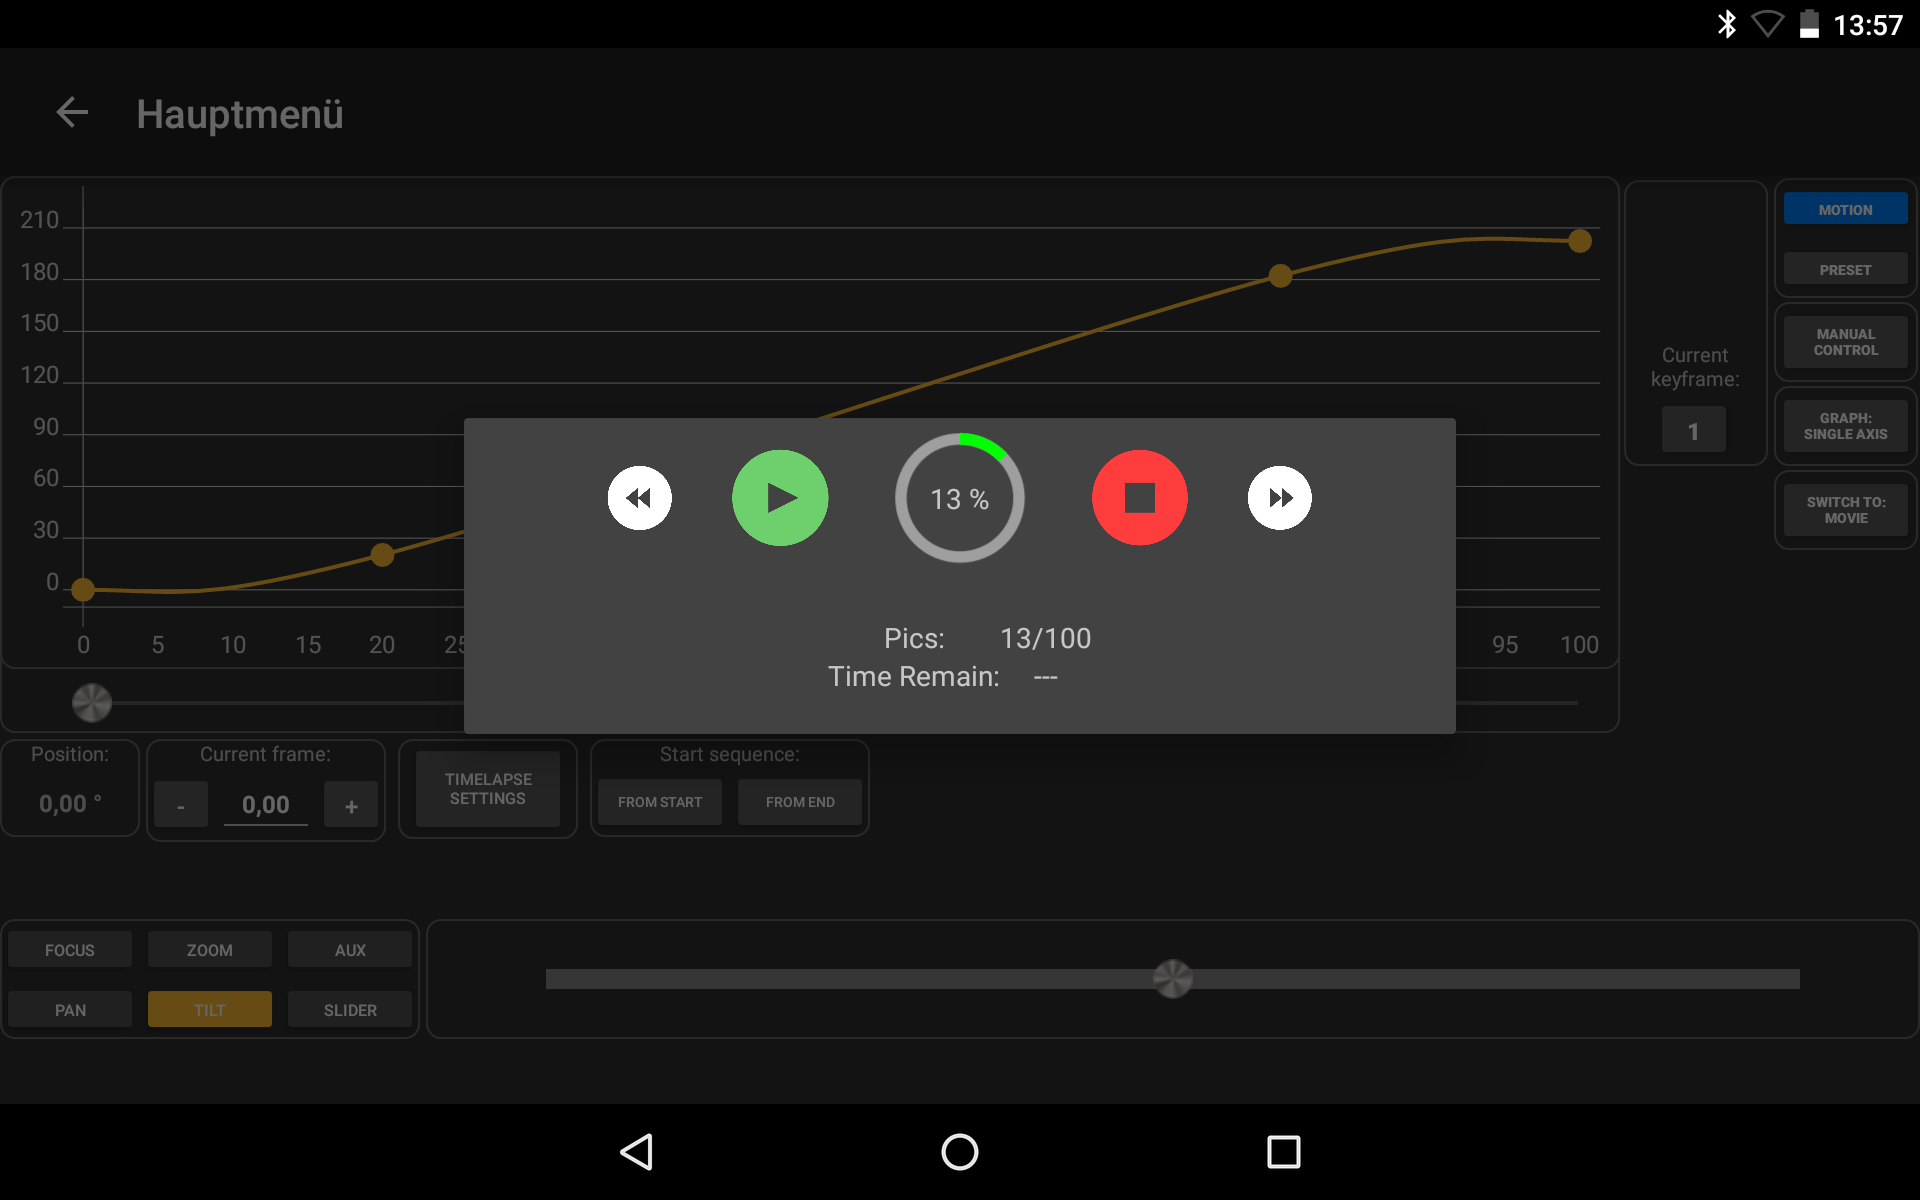
Once you have started the timelapse sequence, the programm will run on the controller. You can close the app. If necessery, you can do a reconnect and check the status.

High COMPATIBILITY

This unit can be used with any motion controller, which supports stepper motors. Due to the universal lens gear belt, almost any lens can be attached.

Individual and free keyframes

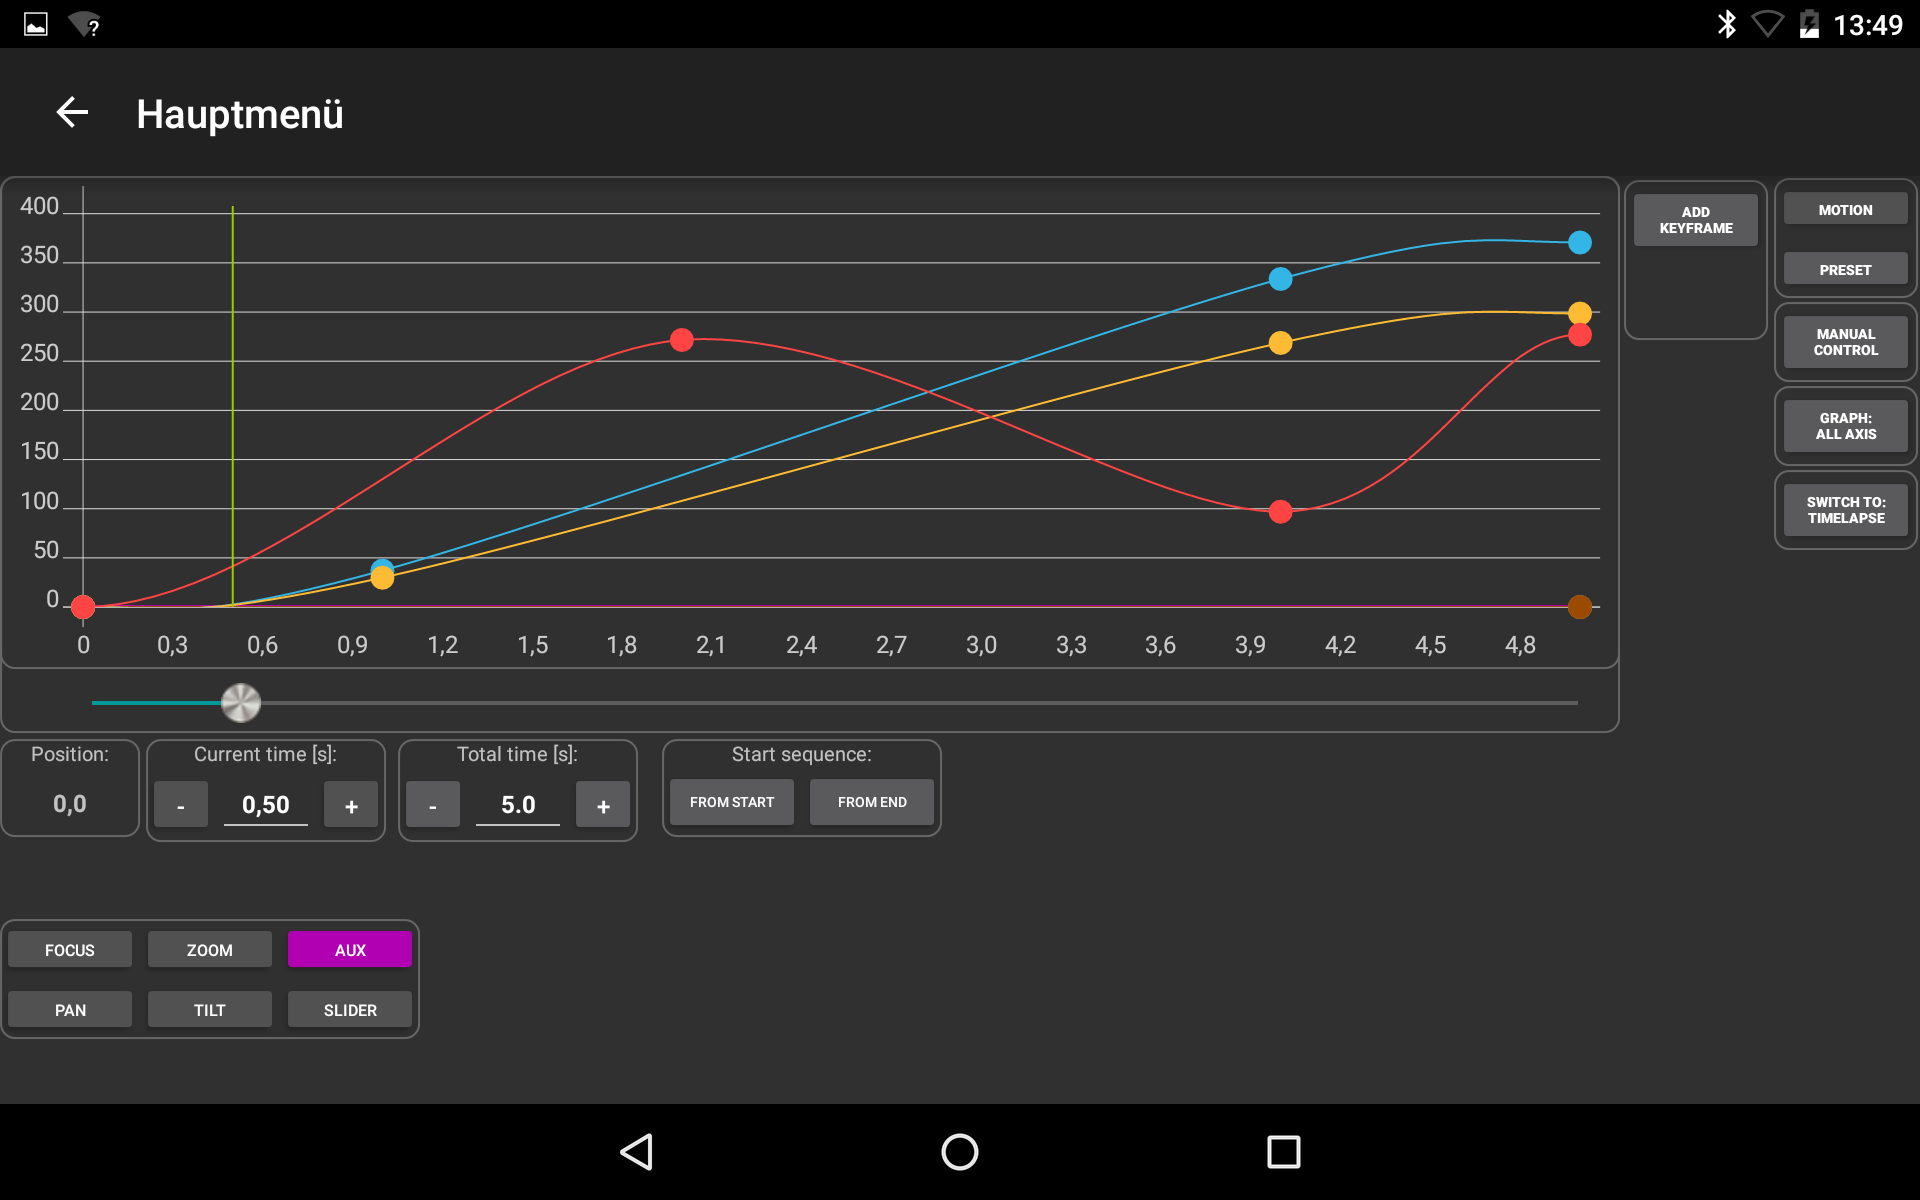
You are able to set a free amount of keyframes (max. 20) for each axis individually. So you are able to do a linear/constant movement with one axis and a completely different movement on the other axis.

FAQ: Timelapse-Mode

Timelapse sequences usually take up a very long time. It would be upsetting if you would run a complete sequence and then notice in the end, that the movement was not set correctly.

So the interface offers a possbility to preview the motion of all axis. You can simply switch between timelapse mode and video mode. So at first, your would setup all positions for all axis and then you can let it run with a continuous movement in video mode.

This way, you are able to record the sequence as a video and to do a quick preview within a few seconds. If you notice a wrong movement, you can quickly adjust the position and reqeat again. Once everything is set correctly, you can switch to timelapse mode and let it run.
The controller will just trigger your camera and will not adjust the exposure time. So you have to set the exposure time on your camera.

The timelapse mode uses a shot-move-shot sequence. The first step is to trigger your camera. Since the controller does not know which exposure time was set on the camera, you have to fill in this information before your start the sequence. This time might be changing during the timelapse sequence, so you have to enter the maximum exposure time which will ever occur.

The next step in the sequence is the stepper movement. There is a predefined time frame for the movement. If you notice a movement during exposure, you might want to increase the "Max. stepper speed" or "Acceleration amount between shots" in the axis config.

After the movement, there will be a delay time to reduce any vibration which might occur during the movement. This delay time is automatically calculated depending on the interval time and the max. exposure time. So you will always have the perfect delay time to reduce any mechanical vibration. If you need a longer delay time, you can increase the interval or reduce the max. exposure time.
Yes, in Timelapse and Video mode it is possible to save the keyframes for all axis as preset. You can enter a custom name for each preset and save it.

Since stepper motors don't have a absolute position, you have to be careful when calling a presets. Which means, that you have to set the correct start position to repeat the exact movement.
Usually, the keyframes are set by moving each axis to the according position.

If you have an axis with a very large distance or a very high gear reduction, it will take a certain time to drive the whole distance. So the setup might take a very long time.

To avoid this time consuming process, you are able to set the keyframe positions "offline". This will mean, that you are able to deactivate the actual movement and directly type in the desired position for each keyframe.

So if you are using a 2 meter slider, you can simply type in 2 meter as end position without moving the slider during the setup process.

You only have to set the start position by manually moving all axis. This will then be set a zero-reference.